安心・無料!ハウスクリーニング業者に一括お見積り
引っ越し業者を探すなら
提供:引越し比較.com
おそうじセレクトのポイント
ハウスクリーニング業者・掃除業者を探すならおそうじセレクト。最大5社のハウスクリーニング業者に一括で見積もり依頼ができます。料金を徹底比較して、お得なハウスクリーニング業者を選びましょう!もちろん 24時間全国対応!
ハウスクリーニング用語集
▼ハウスクリーニング用語:「ハウスクリーニング」って何?
ハウスクリーニングとは主に家の中の室内ハウスクリーニングの事を言います。キッチンや浴室などの設備に対してクリーニングを行ないます。専門の道具や洗剤・技術によりお部屋の中の設備をクリーニングしていきます。片付けや家事のお手伝いとは専門性が異なります。
ハウスクリーニング作業前 ハウスクリーニング作業後
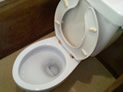
▼ハウスクリーニング用語「水廻り」って何?
キッチン・換気扇・浴室・トイレ・洗面台などの家の中で水を使う部位を言います。水廻りは生活する上で一番中心であり、使用する箇所になりますので、 一番汚れる部分でもあり、ハウスクリーニングで綺麗にしておきたい部分でもあります。風水でも水廻りを綺麗にしておくことが幸運を家の中に呼び込むとも言われるようです。
▼ハウスクリーニング用語「エアコンクリーニング」って何?
エアコンは常に冷たい風や温かい風を送り出しております。風を送り出す分エアコンはお部屋のホコリやタバコのヤニ、カビ、ハウスダストなども吸っております。またエアコンの中部では冷却フィンに冷たいガスが巡っておりますので、湿気などでエアコン内部はカビが繁殖しやすくなっております。エアコンは内部で溜まっている汚れも、冷たい風と共にお部屋の中に送り出します。エアコンクリーニングはエアコンのカバーなどを外し、内部の冷却フィンの部分、風の出るファンの部分を洗浄する事により、溜まった汚れを取り除き、きれいな風を出るようにする作業になります。
▼ハウスクリーニング用語「換気扇・レンジフード」って何?
換気扇・レンジフードとはキッチンの油の煙を吸い、外に出す所です。プロペラ型の換気扇とファン型の換気扇に分かれます。換気扇のプロペラやファンに覆うようにレンジフードが有ります。レンジフードはファンなどを隠すように出来ておりますので、この中は大変汚れが付きやすい部分になっております。ハウスクリーニングで綺麗にしましょう。
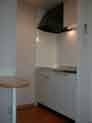
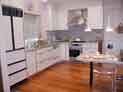
▼ハウスクリーニング用語「キッチンの型」って何?
キッチンはI型・L型・U型・対面式など様々な形がございます。一番シンプルなのがI型が多く、一戸建て、3LDK以上のマンションなどはL型・U型・対面式などが多いようです。最近ではアイランドキッチンなど様々なキッチンが出ているようです。
▼ハウスクリーニング用語「原状回復」って何?
原状回復とは賃貸物件のマンションなどで退去時に入居した時と同じ状態に戻す事のようです。例えば入居した時はほとんどのお部屋がクロスが綺麗でお部屋も綺麗な状態で新しい生活を始めます。2年位そのお部屋に住んで退去する時にはお部屋はどうしても汚れてしまいますので、ハウスクリーニングで入居した時と同じ状態に戻して、次の人に貸せる状態にする事を原状回復と言います。ハウスクリーニングによるこの原状回復は、入居者がするべきか大家さんがするのかは最近は色々と問題もあるようです。
▼ハウスクリーニング用語「界面活性剤」って何?
汚れの中で一番多い汚れは油分です、人体の脂や料理などの油など様々な汚れに油分は含んでおります。掃除をする上で無くてはならないのが水ですが、水と油は混じり合わない為、水だけでは油の汚れは落ちません。界面活性剤とは水と油の間に界面があり、この界面に作用して界面の性質を変え、水と油を混じり合わせる役割をします。界面活性剤の力により油の汚れを取り除く事が出来ます。多くの洗剤や石鹸などには界面活性剤が含まれておりますので、油などの汚れには洗剤が必要になります。